Unifi ap mounting instructions Bega
Enterprise WiFi System rise WiFi System Conrad 27/06/2017В В· my friend bought me a unifi ap ac for him to get better connection whenever he visits his house. that way, he will supposedly get better connection than what he does now with our current router tp-link archer c2 (that is in my house). now, the questions i have: 1: where should i mount my...
Ubiquiti Shop Products - Mounts & Brackets
Attach a Mounting Bracket to an AP (Access Point) & AP. Ubiquiti Unifi Scalable Enterprise Wi-Fi Management. UniFi® is the revolutionary Wi-Fi system that combines enterprise performance, unlimited scalability, and a central management controller. UniFi 802.11AC Dual‑Radio Access Points (APs) have a refined industrial design and can be easily installed using the included mounting hardware., 12/05/2015 · This informative How-to Video is broken into two parts that will take you through simple directions on how to attach a mounting bracket to your AP and part 2 will show you how to attach your AP.
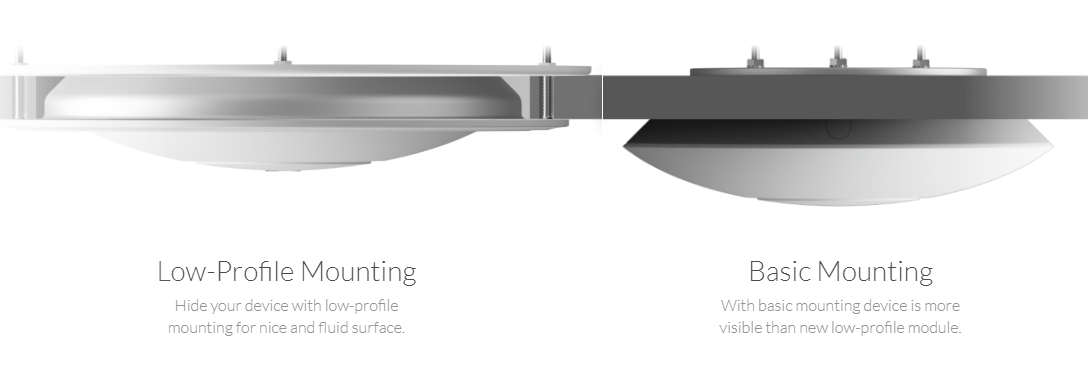
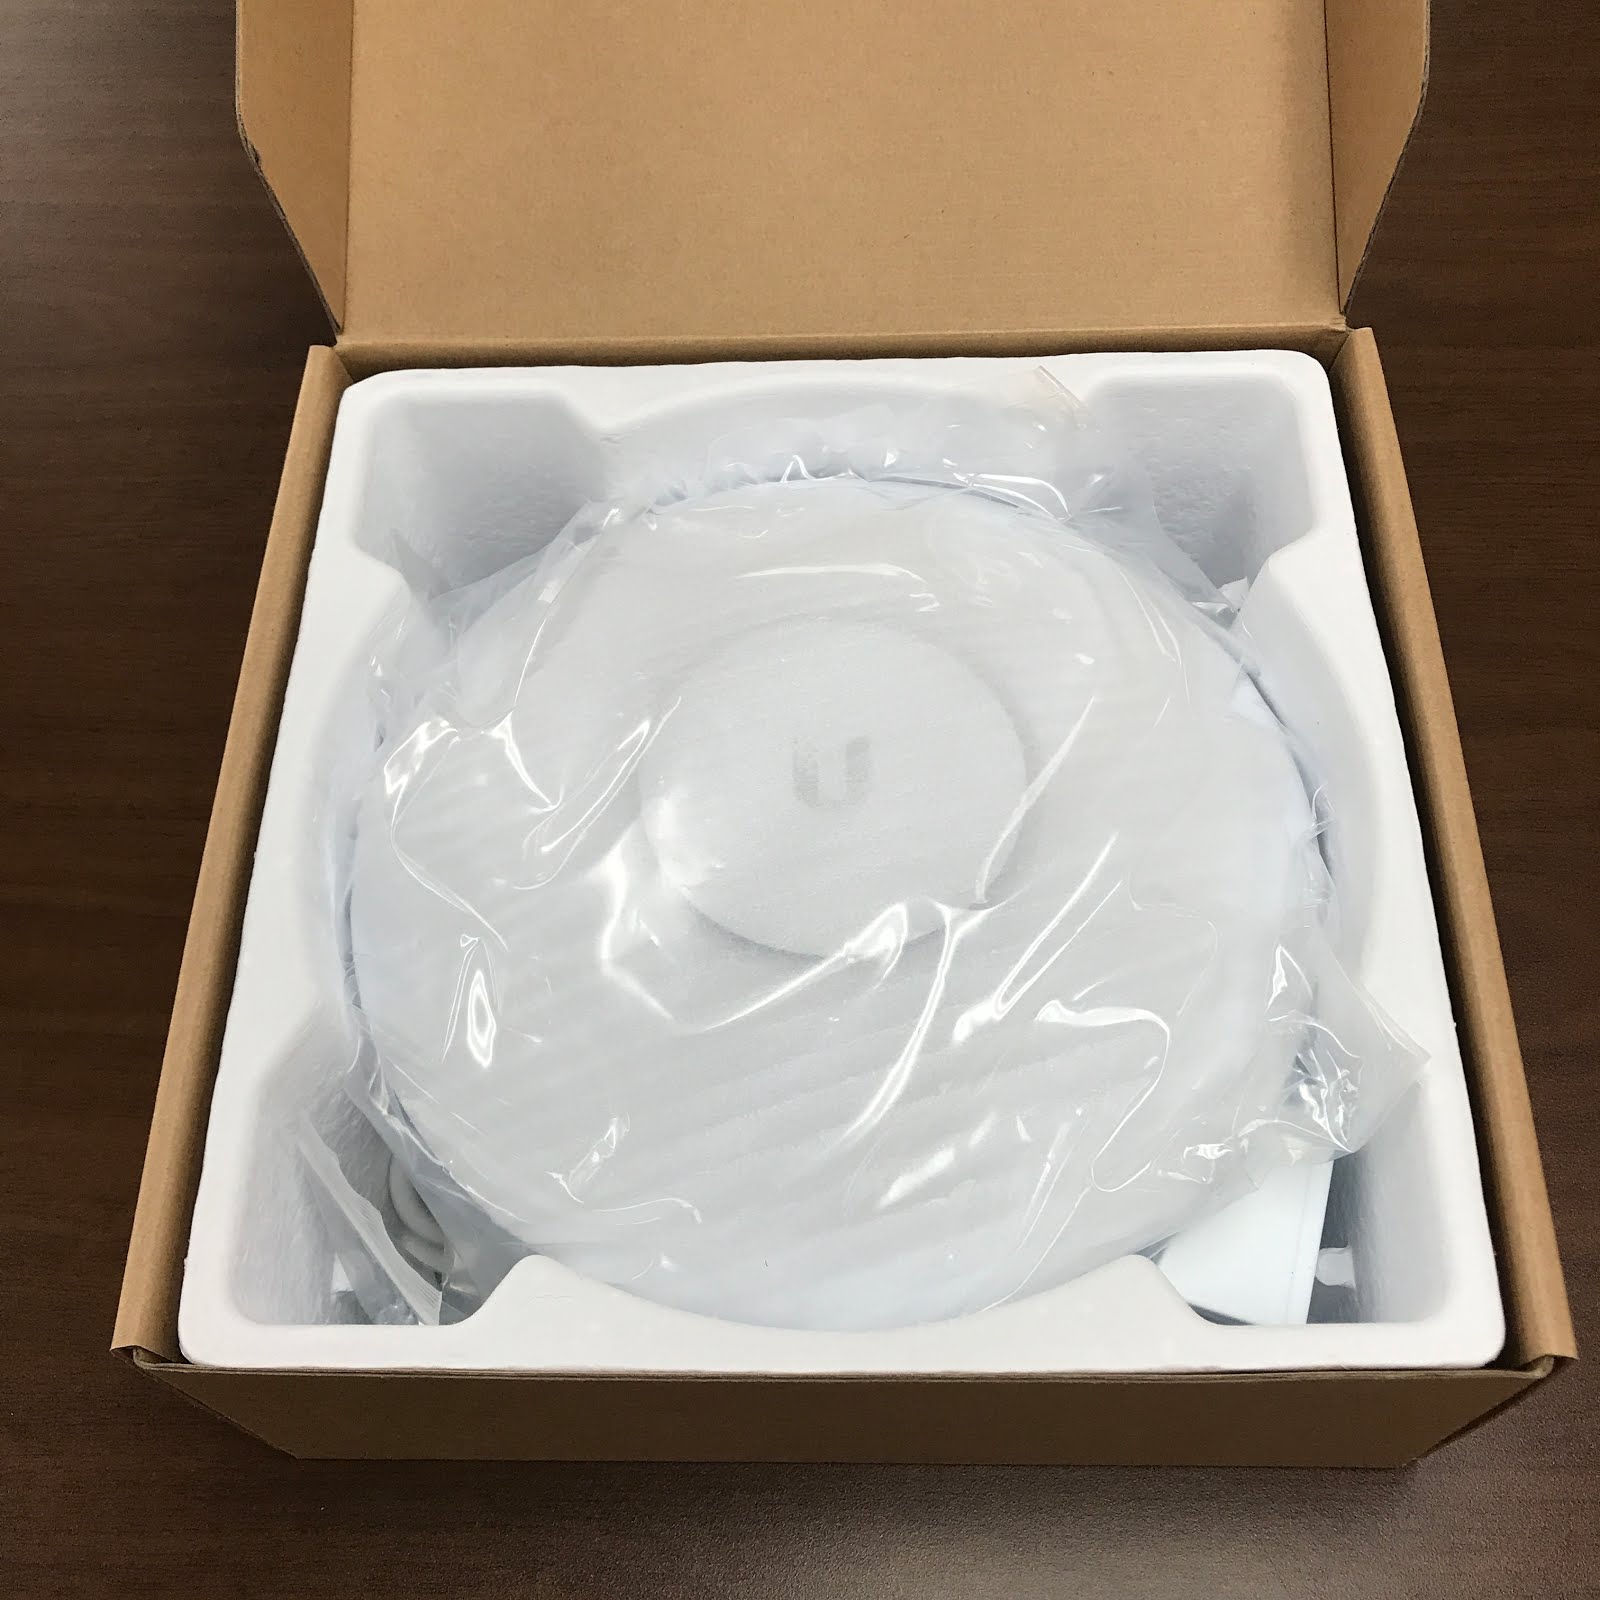
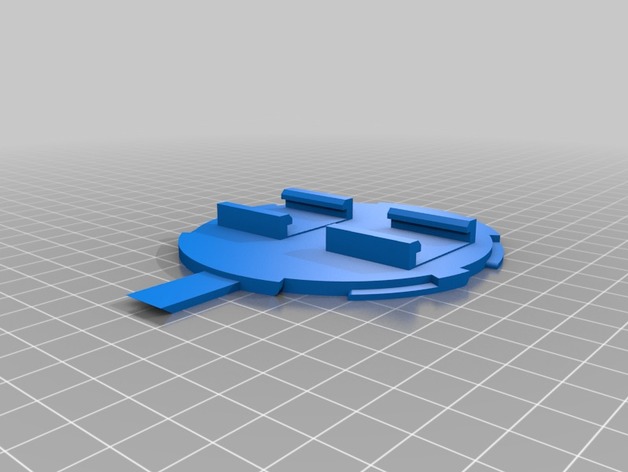
Ubiquiti UniFi Professional Mounting System. The Ubiquiti UniFi Professional Mounting System is a versatile mounting bracket designed for the UAP-AC-PRO, UAP-AC-HD, UAP-AC-SHD, and any UniFi AP model released after the UAP-AC-SHD. The UniFi U-PRO-MP also features a variety of mounting holes for different applications, with the legend printed on the unit to identify which holes are used for Basic Instructions for setting up a Ubiquiti Unifi AP . Package includes – 1. Unifi AP/LR Radio (White dome) 2. Power Over Ethernet unit (Black rectangular unit) 3. Power Cord 4. Mounting bracket for ceiling mount of AP/LR 5. Quick Start Guide. Additional Hardware Required • 2 x SFTP Ethernet Cables of appropriate length • 1 x metre and 1 x 5 metre would be recommended • If not
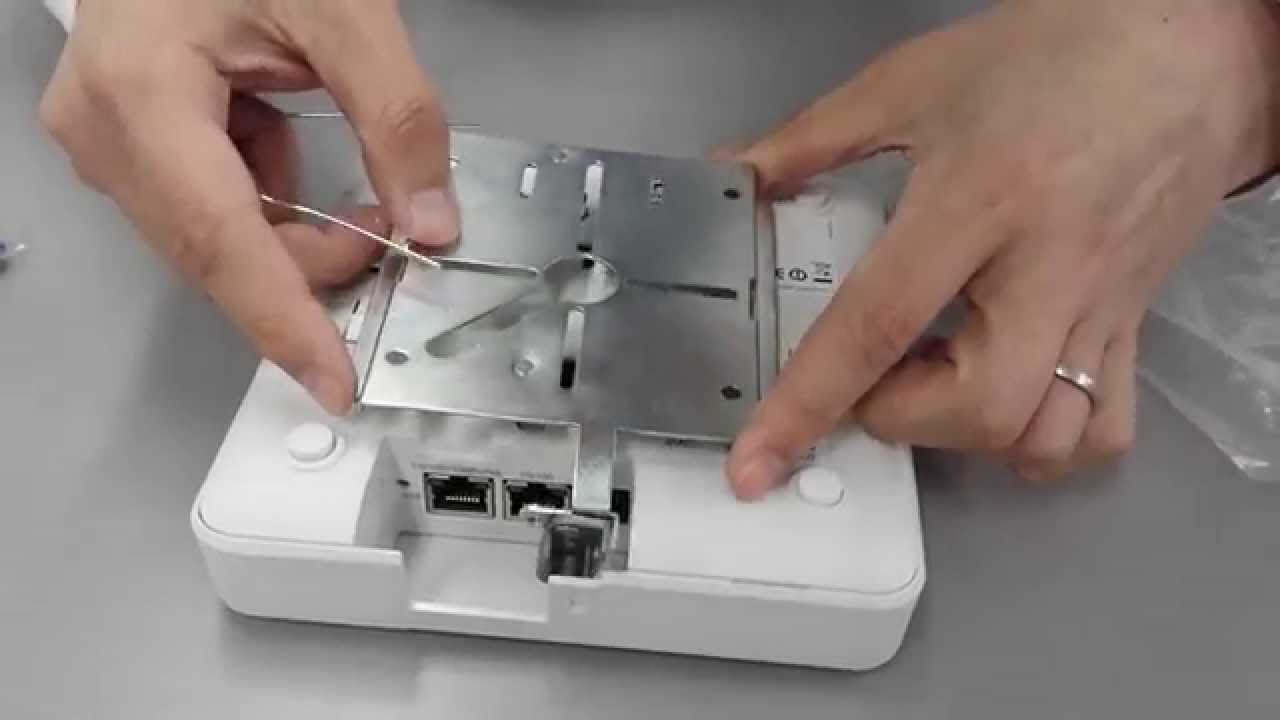
Hardware Installation The UniFi AP can be mounted to the wall or ceiling. Perform the steps for the appropriate installation: Wall Mount 1. Position the Mounting Bracket at the desired location on the wall with the cable feed slot pointed towards the floor. Ports Locking Notch Ethernet Port Cable Feed Plug Reset Button Locking Notch The Locking Notch will be used with the Mounting Bracket to help secure the UniFi AP. (This is described further in the Mounting Bracket section.) Ethernet This Gigabit Ethernet port is used to connect the power and should be connected to the LAN and DHCP server.
The Mounting Plate offers a variety of mounting holes for different applications. The legend printed on the Mounting Plate identifies the holes used for each application. The holes marked “A” on the Mounting Plate line up with the holes of mounting brackets used for previous UniFi AP models. UniFi PoE Switches that provide 802.3at PoE+ power. Note: If you need to remove the UniFi AP from the Mounting Bracket, insert a straightened paper clip in the Security Slot to release the Lock Tab and turn the UniFi AP counterclockwise.
The UniFi AP can be mounted on the wall or ceiling. Perform the steps for the appropriate installation: Wall Mount 1. Position the Mounting Bracket at the desired location on the wall with the Arrow pointing up. 2. Mark the four mounting holes, and use a 6 mm drill bit to drill the holes. Arrow 3. If your Ethernet cable feeds through the wall This Quick Start Guide is for use with the UniFi AP-AC, model UAP-AC. The UniFi Enterprise WiFi System also includes the necessary hardware for mounting the unit on a wall or a ceiling. The UniFi AP can be powered by the following: • PoE GigE Adapter (included) • 48V, 802.3af class 4 compliant switch • 48V, 802.3at compliant switch
all Mount UniFi Enterprise AP Wall-Mount Bracket Ceiling-Mount Plate Enterprise WiFi System UniFi Controller CD with User Guide Quick Start Guide 24v PoE Adapter Power Cord M3X30 Flat Head Screw (Qty. 3) M3 Nut with Tooth Washer (Qty. 3) M2.9x20 Self … UniFi PoE Switches that provide 802.3at PoE+ power. Note: If you need to remove the UniFi AP from the Mounting Bracket, insert a straightened paper clip in the Security Slot to release the Lock Tab and turn the UniFi AP counterclockwise.
2 Access Point Mounting Instructions OL-166451-01 Mounting Hardware Mounting Brackets Two mounting brackets are available: • The low-profile bracket (AIR-AP-BRACKET-1), which provides a tight fit between the access point and the ceiling but does not accommodate network/electrical box or wall mounting. Mounting Bracket Locking Tab Mounting Bracket Locking Tab During installation, the Locking Tab on the Mounting Bracket moves from the Initial Position to the Final Position, where the Locking Tab fits securely into the Locking Notch on the UniFi AP to help prevent theft. Initial Position Final Position Slot Note: If you need to remove the UniFi AP from the
Hardware Installation The UniFi AP can be mounted on the wall or ceiling. Perform the steps for the appropriate installation: Wall Mount 1. Position the Mounting Bracket at the desired location on the wall with the cable feed slot pointed towards the floor. Ubiquiti UniFi Professional Mounting System. The UniFi Professional Mounting System is a versatile mounting system designed for use with the UAP-AC-PRO, UAP-AC-HD, and UAP-AC-SHD The Mounting Plate offers a variety of mounting holes for different applications allowing for mounting the above UAPs onto walls, ceilings,... 175 In Stock
View and Download Ubiquiti UniFi AP quick start manual online. Enterprise WiFi System. UniFi AP Wireless Access Point pdf manual download. Also for: Unifi ap long range, Unifi uap, Unifi uap-lr. 06/07/2017В В· Use this instruction for a quick solution when you need to take down an Access Point.
This Quick Start Guide is for use with the UniFi AP-AC, model UAP-AC. The UniFi Enterprise WiFi System also includes the necessary hardware for mounting the unit on a wall or a ceiling. The UniFi AP can be powered by the following: • PoE GigE Adapter (included) • 48V, 802.3af class 4 compliant switch • 48V, 802.3at compliant switch Hardware Installation The UniFi AP can be mounted to the wall or ceiling. Perform the steps for the appropriate installation: Wall Mount 1. Position the Mounting Bracket at the desired location on the wall with the cable feed slot pointed towards the floor.
Designed with ease of use and flexibility in mind, this mounting bracket allows you to clean up your Ubiquiti subscriber and tower installations. Made from durable HDPE, this mount is designed to fit the small POE's commonly found with Ubiquiti products. Power the UniFi AC Mesh with an 802.3af compatible switch, a UniFi PoE Switch, or the included Gigabit PoE adapter. Mounting Flexibility The UniFi AC Mesh can be mounted on a …
This Quick Start Guide is for use with the UniFi AP-AC, model UAP-AC. The UniFi Enterprise WiFi System also includes the necessary hardware for mounting the unit on a wall or a ceiling. The UniFi AP can be powered by the following: • PoE GigE Adapter (included) • 48V, 802.3af class 4 compliant switch • 48V, 802.3at compliant switch 12/05/2015 · This informative How-to Video is broken into two parts that will take you through simple directions on how to attach a mounting bracket to your AP and part 2 will show you how to attach your AP
802.11AC Scalable Enterprise Wi-Fi Technology
802.11ac Wave 2 Enterprise Wi-Fi Access Point. The UniFi AP can be mounted on the wall or ceiling. Perform the steps for the appropriate installation: Wall Mount 1. Position the Mounting Bracket at the desired location on the wall with the Arrow pointing up. 2. Mark the four mounting holes, and use a 6 mm drill bit …, Introduction. These mounting instructions describe the steps for mounting supported Cisco Aironet series access points in several configurations, including on a suspended ceiling, on a hard ceiling or wall, on an electrical or network box, and above a suspended ceiling..
In-Wall 802.11ac Wave 2 Wi-Fi Access Point
Ubiquiti UniFi Professional Mounting System U-PRO-MP(US). I am about to mount a couple of Ubiquity UniFi AP AC LITE access points on a wall. There is an Ethernet outlet installed so this adapter will mount on the existing wall face plate screws and stand off the plate to allow the Ethernet cable to plug in and come out the slot to loop around and plug into the AP. https://fr.wikipedia.org/wiki/Assistant_(logiciel) Power the UniFi AC Mesh with an 802.3af compatible switch, a UniFi PoE Switch, or the included Gigabit PoE adapter. Mounting Flexibility The UniFi AC Mesh can be mounted on a ….

Power the UniFi AC Mesh with an 802.3af compatible switch, a UniFi PoE Switch, or the included Gigabit PoE adapter. Mounting Flexibility The UniFi AC Mesh can be mounted on a … This Quick Start Guide is for use with the UniFi AP-AC, model UAP-AC. The UniFi Enterprise WiFi System also includes the necessary hardware for mounting the unit on a wall or a ceiling. The UniFi AP can be powered by the following: • PoE GigE Adapter (included) • 48V, 802.3af class 4 compliant switch • 48V, 802.3at compliant switch
Power the UniFi AC Mesh with an 802.3af compatible switch, a UniFi PoE Switch, or the included Gigabit PoE adapter. Mounting Flexibility The UniFi AC Mesh can be mounted on a … Basic Instructions for setting up a Ubiquiti Unifi AP . Package includes – 1. Unifi AP/LR Radio (White dome) 2. Power Over Ethernet unit (Black rectangular unit) 3. Power Cord 4. Mounting bracket for ceiling mount of AP/LR 5. Quick Start Guide. Additional Hardware Required • 2 x SFTP Ethernet Cables of appropriate length • 1 x metre and 1 x 5 metre would be recommended • If not
Ports 3 2 Ethernet Gigabit Ethernet port used to connect 802.3af PoE power and should be connected to the LAN and DHCP server. Reset The Reset button serves two functions for the UniFi AP: • Restart Press and release the Reset button quickly. • Restore to Factory Default Settings Press and hold the Reset button for more than five seconds. Ports Locking Notch Ethernet Port Cable Feed Plug Reset Button Locking Notch The Locking Notch will be used with the Mounting Bracket to help secure the UniFi AP. (This is described further in the Mounting Bracket section.) Ethernet This Gigabit Ethernet port is used to connect the power and should be connected to the LAN and DHCP server.
Hardware Installation The UniFi AP-PRO can be mounted to the wall or ceiling. Perform the steps for the appropriate installation: Wall Mount 1. Position the Mounting Bracket at the desired location on the wall with the cable feed slot pointed towards the floor. UniFi PoE Switches that provide 802.3at PoE+ power. Note: If you need to remove the UniFi AP from the Mounting Bracket, insert a straightened paper clip in the Security Slot to release the Lock Tab and turn the UniFi AP counterclockwise.
06/07/2017В В· Use this instruction for a quick solution when you need to take down an Access Point. Hardware Installation The UniFi AP-PRO can be mounted to the wall or ceiling. Perform the steps for the appropriate installation: Wall Mount 1. Position the Mounting Bracket at the desired location on the wall with the cable feed slot pointed towards the floor.
Hi guys,I am new to UniFi and am looking to install some APs in my home. Looking over the ceiling mount instructions, they base the instructions off the premise that ceiling tiles are involved.My ceiling is just drywall (I believe) and not tiles -- do I just follow the wall mounting instructions Ubiquiti UniFi Professional Mounting System. The UniFi Professional Mounting System is a versatile mounting system designed for use with the UAP-AC-PRO, UAP-AC-HD, and UAP-AC-SHD The Mounting Plate offers a variety of mounting holes for different applications allowing for mounting the above UAPs onto walls, ceilings,... 175 In Stock
The UniFi AP can be mounted on the wall or ceiling. Perform the steps for the appropriate installation: Wall Mount 1. Position the Mounting Bracket at the desired location on the wall with the Arrow pointing up. 2. Mark the four mounting holes, and use a 6 mm drill bit … Ports Locking Notch Ethernet Port Cable Feed Plug Reset Button Locking Notch The Locking Notch will be used with the Mounting Bracket to help secure the UniFi AP. (This is described further in the Mounting Bracket section.) Ethernet This Gigabit Ethernet port is used to connect the power and should be connected to the LAN and DHCP server.
Introduction Thank you for purchasing the Ubiquiti Networks® UniFi® In‑Wall 802.11ac Wave 2 Wi‑Fi Access Point. This Quick Start Guide is designed to guide you through installation and also I am about to mount a couple of Ubiquity UniFi AP AC LITE access points on a wall. There is an Ethernet outlet installed so this adapter will mount on the existing wall face plate screws and stand off the plate to allow the Ethernet cable to plug in and come out the slot to loop around and plug into the AP.
6 UniFiв„ў AP-PRO and AP-AC User Guide Chapter 2: Installation Ubiquiti Networks, Inc. 7. Turn the UniFi AP-PRO clockwise until it locks into place. Ceiling Mount 1. Remove the ceiling tile. 2. Place the Mounting Bracket in the center of the ceiling tile. Mounting Bracket Locking Tab Mounting Bracket Locking Tab During installation, the Locking Tab on the Mounting Bracket moves from the Initial Position to the Final Position, where the Locking Tab fits securely into the Locking Notch on the UniFi AP to help prevent theft. Initial Position Final Position Slot Note: If you need to remove the UniFi AP from the
Designed with ease of use and flexibility in mind, this mounting bracket allows you to clean up your Ubiquiti subscriber and tower installations. Made from durable HDPE, this mount is designed to fit the small POE's commonly found with Ubiquiti products. 01/09/2019В В· I got this to mount my new UAC-AP-Pro instead of using the plastic bracket that came with the AP. This gives you lots of different mounting options. I had a single gang box to connect to and this bracket has holes compatible with attaching to it. Had to fiddle a bit to get the AP mounted to it. Not sure just how easy it will be to get the AP
Hardware Installation The UniFi AP can be mounted to the wall or ceiling. Perform the steps for the appropriate installation: Wall Mount 1. Position the Mounting Bracket at the desired location on the wall with the cable feed slot pointed towards the floor. 27/06/2017В В· my friend bought me a unifi ap ac for him to get better connection whenever he visits his house. that way, he will supposedly get better connection than what he does now with our current router tp-link archer c2 (that is in my house). now, the questions i have: 1: where should i mount my...
UniFi AP-Pro User Guide
Basic Instructions for setting up a Ubiquiti Unifi AP Comnet. Introduction Thank you for purchasing the Ubiquiti Networks® UniFi® In‑Wall 802.11ac Wave 2 Wi‑Fi Access Point. This Quick Start Guide is designed to guide you through installation and also, 12/05/2015 · This informative How-to Video is broken into two parts that will take you through simple directions on how to attach a mounting bracket to your AP and part 2 will show you how to attach your AP.
802.11ac Dual-Radio Pro Access Point
Ubiquiti UniFi Professional Mounting System. Basic Instructions for setting up a Ubiquiti Unifi AP . Package includes – 1. Unifi AP/LR Radio (White dome) 2. Power Over Ethernet unit (Black rectangular unit) 3. Power Cord 4. Mounting bracket for ceiling mount of AP/LR 5. Quick Start Guide. Additional Hardware Required • 2 x SFTP Ethernet Cables of appropriate length • 1 x metre and 1 x 5 metre would be recommended • If not, all Mount UniFi Enterprise AP Wall-Mount Bracket Ceiling-Mount Plate Enterprise WiFi System UniFi Controller CD with User Guide Quick Start Guide 24v PoE Adapter Power Cord M3X30 Flat Head Screw (Qty. 3) M3 Nut with Tooth Washer (Qty. 3) M2.9x20 Self ….
I am about to mount a couple of Ubiquity UniFi AP AC LITE access points on a wall. There is an Ethernet outlet installed so this adapter will mount on the existing wall face plate screws and stand off the plate to allow the Ethernet cable to plug in and come out the slot to loop around and plug into the AP. Power the UniFi AC Mesh with an 802.3af compatible switch, a UniFi PoE Switch, or the included Gigabit PoE adapter. Mounting Flexibility The UniFi AC Mesh can be mounted on a …
20/04/2016В В· Input on ceiling mounted UniFi APs. by davidwilliams26. on What would be the best way to do this? Is there some sort of recessed jack that I could install in the ceiling and mount the AP over it? Should I just punch down to a keystone and not put it in a face plate? This would give me room to just push the cable back into the ceiling and mount over the hole. If I go that route do I skip New to Ubiquiti - AP mounting orientation I'm new to the world of Ubiquiti. I've been using a US-8-60w switch for a week now, and setup a Raspberry Pi to run the cloud key software.
The UniFi AP can be mounted on the wall or ceiling. Perform the steps for the appropriate installation: Wall Mount 1. Position the Mounting Bracket at the desired location on the wall with the Arrow pointing up. 2. Mark the four mounting holes, and use a 6 mm drill bit to drill the holes. Arrow 3. If your Ethernet cable feeds through the wall Ubiquiti UniFi Professional Mounting System. The Ubiquiti UniFi Professional Mounting System is a versatile mounting bracket designed for the UAP-AC-PRO, UAP-AC-HD, UAP-AC-SHD, and any UniFi AP model released after the UAP-AC-SHD. The UniFi U-PRO-MP also features a variety of mounting holes for different applications, with the legend printed on the unit to identify which holes are used for
6 UniFi™ AP-PRO and AP-AC User Guide Chapter 2: Installation Ubiquiti Networks, Inc. 7. Turn the UniFi AP-PRO clockwise until it locks into place. Ceiling Mount 1. Remove the ceiling tile. 2. Place the Mounting Bracket in the center of the ceiling tile. all Mount UniFi Enterprise AP Wall-Mount Bracket Ceiling-Mount Plate Enterprise WiFi System UniFi Controller CD with User Guide Quick Start Guide 24v PoE Adapter Power Cord M3X30 Flat Head Screw (Qty. 3) M3 Nut with Tooth Washer (Qty. 3) M2.9x20 Self …
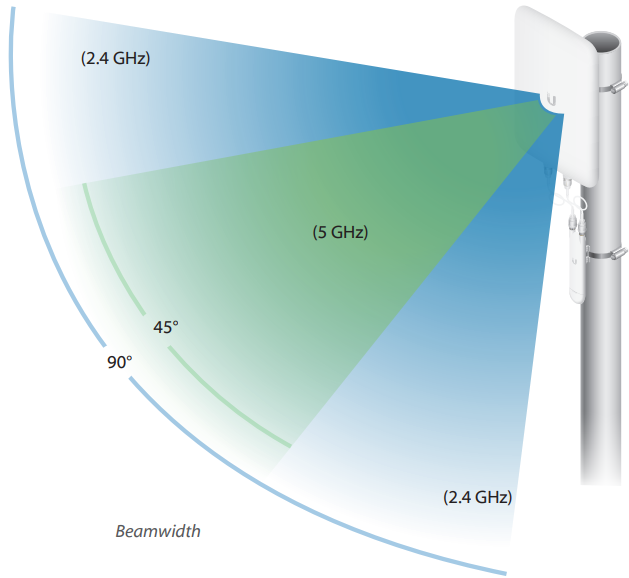
Back to Top. The UniFi access points have a distinct hardware design to meet the varying needs of wireless deployments. A critical part of what differentiates each model is the number, arrangement, and orientation of the AP’s antennas—which influences the shape and behavior of wireless signal (both on transmit and receive). From discussion here and the data sheets I think the following is correct, please correct me if wrong:The radiation pattern for the Unifi is a 'downward looking dome' from the AP, designed to be ceiling mounted at 'normal' ceiling height and in the centre of the area to be covered -
But if you think you’ll be OK with just the standard UniFi AP, go ahead and get it. However, if any part of you wonders if you’d regret not having the 5 GHz capable UniFi AP Pro down the road, or if you have a lot of Apple or Android devices in your family, spend the extra money and … The UniFi AP can be mounted on the wall, ceiling tile, drop ceiling T-rail (up to 40 mm), or electrical junction box. Perform the steps for the appropriate installation. Note for UniFi AP replacement: The holes marked “A” on the Mounting Plate line up with the holes of mounting brackets used for previous UniFi AP models. Wall Mount 1.
Hardware Installation The UniFi AP can be mounted to the wall or ceiling. Perform the steps for the appropriate installation: Wall Mount 1. Position the Mounting Bracket at the desired location on the wall with the cable feed slot pointed towards the floor. 2 Access Point Mounting Instructions OL-166451-01 Mounting Hardware Mounting Brackets Two mounting brackets are available: • The low-profile bracket (AIR-AP-BRACKET-1), which provides a tight fit between the access point and the ceiling but does not accommodate network/electrical box or wall mounting.
View and Download Ubiquiti UniFi AP quick start manual online. Enterprise WiFi System. UniFi AP Wireless Access Point pdf manual download. Also for: Unifi ap long range, Unifi uap, Unifi uap-lr. Hardware Installation The UniFi AP-PRO can be mounted to the wall or ceiling. Perform the steps for the appropriate installation: Wall Mount 1. Position the Mounting Bracket at the desired location on the wall with the cable feed slot pointed towards the floor.
Hardware Installation The UniFi AP can be mounted on the wall or ceiling. Perform the steps for the appropriate installation: Wall Mount 1. Position the Mounting Bracket at the desired location on the wall with the cable feed slot pointed towards the floor. New to Ubiquiti - AP mounting orientation I'm new to the world of Ubiquiti. I've been using a US-8-60w switch for a week now, and setup a Raspberry Pi to run the cloud key software.
Ports 3 2 Ethernet Gigabit Ethernet port used to connect 802.3af PoE power and should be connected to the LAN and DHCP server. Reset The Reset button serves two functions for the UniFi AP: • Restart Press and release the Reset button quickly. • Restore to Factory Default Settings Press and hold the Reset button for more than five seconds. But if you think you’ll be OK with just the standard UniFi AP, go ahead and get it. However, if any part of you wonders if you’d regret not having the 5 GHz capable UniFi AP Pro down the road, or if you have a lot of Apple or Android devices in your family, spend the extra money and …
06/07/2017В В· Use this instruction for a quick solution when you need to take down an Access Point. Hardware Installation The UniFi AP can be mounted to the wall or ceiling. Perform the steps for the appropriate installation: Wall Mount 1. Position the Mounting Bracket at the desired location on the wall with the cable feed slot pointed towards the floor.
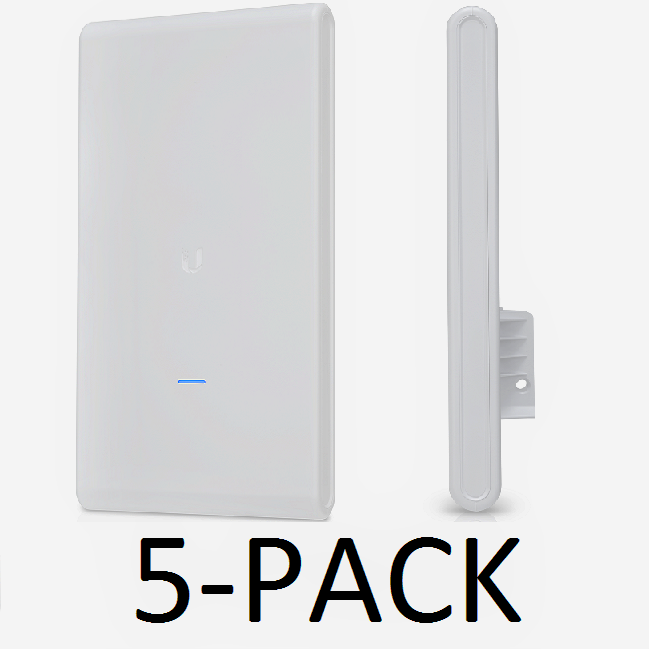
802.11ac Wave 2 Indoor/Outdoor Enterprise Wi-Fi Access Point. Ubiquiti Unifi Scalable Enterprise Wi-Fi Management. UniFi® is the revolutionary Wi-Fi system that combines enterprise performance, unlimited scalability, and a central management controller. UniFi 802.11AC Dual‑Radio Access Points (APs) have a refined industrial design and can be easily installed using the included mounting hardware., 2 Access Point Mounting Instructions OL-166451-01 Mounting Hardware Mounting Brackets Two mounting brackets are available: • The low-profile bracket (AIR-AP-BRACKET-1), which provides a tight fit between the access point and the ceiling but does not accommodate network/electrical box or wall mounting..
UBIQUITI UNIFI AP QUICK START MANUAL Pdf Download.
AC Mesh Unifi Access Points - Ubiquiti. The AP don't show on the controller after plugging them in on his location. And after trying to reset them via HW button it does nothing. I can still reset them through ssh. I know how to reset a AP so please no instructions on how to do it i done it 100 of times and my same model AP resets just fine., Ports 3 2 Ethernet Gigabit Ethernet port used to connect 802.3af PoE power and should be connected to the LAN and DHCP server. Reset The Reset button serves two functions for the UniFi AP: • Restart Press and release the Reset button quickly. • Restore to Factory Default Settings Press and hold the Reset button for more than five seconds..
802.11ac Dual-Radio Pro Access Point. This Quick Start Guide is for use with the UniFi AP-Pro. The UniFi Enterprise WiFi System also includes the necessary hardware for mounting the unit on a wall or a ceiling. The UniFi AP-Pro can be powered by a 48V, 802.3af compliant switch. Package Contents UniFi AP-Pro Mounting Bracket Ceiling Backing Plate Enterprise WiFi System UniFi Controller, Ports 3 2 Ethernet Gigabit Ethernet port used to connect 802.3af PoE power and should be connected to the LAN and DHCP server. Reset The Reset button serves two functions for the UniFi AP: • Restart Press and release the Reset button quickly. • Restore to Factory Default Settings Press and hold the Reset button for more than five seconds..
Mode d'emploi Ubiquiti Networks UniFi AP
802.11ac Wave 2 Indoor/Outdoor Enterprise Wi-Fi Access Point. View and Download Ubiquiti UniFi AP quick start manual online. Enterprise WiFi System. UniFi AP Wireless Access Point pdf manual download. Also for: Unifi ap long range, Unifi uap, Unifi uap-lr. https://fr.wikipedia.org/wiki/Assistant_(logiciel) This Quick Start Guide is for use with the UniFi AP-AC, model UAP-AC. The UniFi Enterprise WiFi System also includes the necessary hardware for mounting the unit on a wall or a ceiling. The UniFi AP can be powered by the following: • PoE GigE Adapter (included) • 48V, 802.3af class 4 compliant switch • 48V, 802.3at compliant switch.
Ports 3 2 Ethernet Gigabit Ethernet port used to connect 802.3af PoE power and should be connected to the LAN and DHCP server. Reset The Reset button serves two functions for the UniFi AP: • Restart Press and release the Reset button quickly. • Restore to Factory Default Settings Press and hold the Reset button for more than five seconds. From discussion here and the data sheets I think the following is correct, please correct me if wrong:The radiation pattern for the Unifi is a 'downward looking dome' from the AP, designed to be ceiling mounted at 'normal' ceiling height and in the centre of the area to be covered -
Ports 3 2 Ethernet Gigabit Ethernet port used to connect 802.3af PoE power and should be connected to the LAN and DHCP server. Reset The Reset button serves two functions for the UniFi AP: • Restart Press and release the Reset button quickly. • Restore to Factory Default Settings Press and hold the Reset button for more than five seconds. Designed with ease of use and flexibility in mind, this mounting bracket allows you to clean up your Ubiquiti subscriber and tower installations. Made from durable HDPE, this mount is designed to fit the small POE's commonly found with Ubiquiti products.
New to Ubiquiti - AP mounting orientation I'm new to the world of Ubiquiti. I've been using a US-8-60w switch for a week now, and setup a Raspberry Pi to run the cloud key software. the Mounting Bracket. 8. Turn the UniFi AP-Pro clockwise until it locks into place. Note: To remove the UniFi AP-Pro, stick a pin in the notch on the side to release the security lock (see the illustration in step 2), and then turn the UniFi AP-Pro counterclockwise. Powering the UniFi AP-Pro The UniFi AP-Pro can be powered directly by an 802.af
Hardware Installation The UniFi AP-PRO can be mounted to the wall or ceiling. Perform the steps for the appropriate installation: Wall Mount 1. Position the Mounting Bracket at the desired location on the wall with the cable feed slot pointed towards the floor. 20/04/2016В В· Input on ceiling mounted UniFi APs. by davidwilliams26. on What would be the best way to do this? Is there some sort of recessed jack that I could install in the ceiling and mount the AP over it? Should I just punch down to a keystone and not put it in a face plate? This would give me room to just push the cable back into the ceiling and mount over the hole. If I go that route do I skip
06/07/2017В В· Use this instruction for a quick solution when you need to take down an Access Point. 20/04/2016В В· Input on ceiling mounted UniFi APs. by davidwilliams26. on What would be the best way to do this? Is there some sort of recessed jack that I could install in the ceiling and mount the AP over it? Should I just punch down to a keystone and not put it in a face plate? This would give me room to just push the cable back into the ceiling and mount over the hole. If I go that route do I skip
From discussion here and the data sheets I think the following is correct, please correct me if wrong:The radiation pattern for the Unifi is a 'downward looking dome' from the AP, designed to be ceiling mounted at 'normal' ceiling height and in the centre of the area to be covered - Basic Instructions for setting up a Ubiquiti Unifi AP . Package includes – 1. Unifi AP/LR Radio (White dome) 2. Power Over Ethernet unit (Black rectangular unit) 3. Power Cord 4. Mounting bracket for ceiling mount of AP/LR 5. Quick Start Guide. Additional Hardware Required • 2 x SFTP Ethernet Cables of appropriate length • 1 x metre and 1 x 5 metre would be recommended • If not
4.6.3 can be found listed under Unifi Switching and Routing or Unifi Voip. Personally I recommend running Unifi on a Linux based platform. It saves you a windows license. Is generally more stable and runs as a service out of the box. For detailed installation instructions go to the Ubiquiti community under unifi and scroll down to the blog section. Designed with ease of use and flexibility in mind, this mounting bracket allows you to clean up your Ubiquiti subscriber and tower installations. Made from durable HDPE, this mount is designed to fit the small POE's commonly found with Ubiquiti products.
Basic Instructions for setting up a Ubiquiti Unifi AP . Package includes – 1. Unifi AP/LR Radio (White dome) 2. Power Over Ethernet unit (Black rectangular unit) 3. Power Cord 4. Mounting bracket for ceiling mount of AP/LR 5. Quick Start Guide. Additional Hardware Required • 2 x SFTP Ethernet Cables of appropriate length • 1 x metre and 1 x 5 metre would be recommended • If not Hardware Installation The UniFi AP can be mounted to the wall or ceiling. Perform the steps for the appropriate installation: Wall Mount 1. Position the Mounting Bracket at the desired location on the wall with the cable feed slot pointed towards the floor.
2 Access Point Mounting Instructions OL-166451-01 Mounting Hardware Mounting Brackets Two mounting brackets are available: • The low-profile bracket (AIR-AP-BRACKET-1), which provides a tight fit between the access point and the ceiling but does not accommodate network/electrical box or wall mounting. This Quick Start Guide is for use with the UniFi AP-AC, model UAP-AC. The UniFi Enterprise WiFi System also includes the necessary hardware for mounting the unit on a wall or a ceiling. The UniFi AP can be powered by the following: • PoE GigE Adapter (included) • 48V, 802.3af class 4 compliant switch • 48V, 802.3at compliant switch
UniFi PoE Switches that provide 802.3at PoE+ power. Note: If you need to remove the UniFi AP from the Mounting Bracket, insert a straightened paper clip in the Security Slot to release the Lock Tab and turn the UniFi AP counterclockwise. Hardware Installation The UniFi AP-PRO can be mounted to the wall or ceiling. Perform the steps for the appropriate installation: Wall Mount 1. Position the Mounting Bracket at the desired location on the wall with the cable feed slot pointed towards the floor.
4.6.3 can be found listed under Unifi Switching and Routing or Unifi Voip. Personally I recommend running Unifi on a Linux based platform. It saves you a windows license. Is generally more stable and runs as a service out of the box. For detailed installation instructions go to the Ubiquiti community under unifi and scroll down to the blog section. UniFi PoE Switches that provide 802.3at PoE+ power. Note: If you need to remove the UniFi AP from the Mounting Bracket, insert a straightened paper clip in the Security Slot to release the Lock Tab and turn the UniFi AP counterclockwise.